Getting started · Step 2
Set up your AI Receptionist
Fill in the basics so your receptionist greets callers as your business and asks the questions you'd ask.
≈ 5 minutes
Open Settings → Assistant in the portal. Every field has a sensible default for your trade — leave one blank and we fill it in for you.
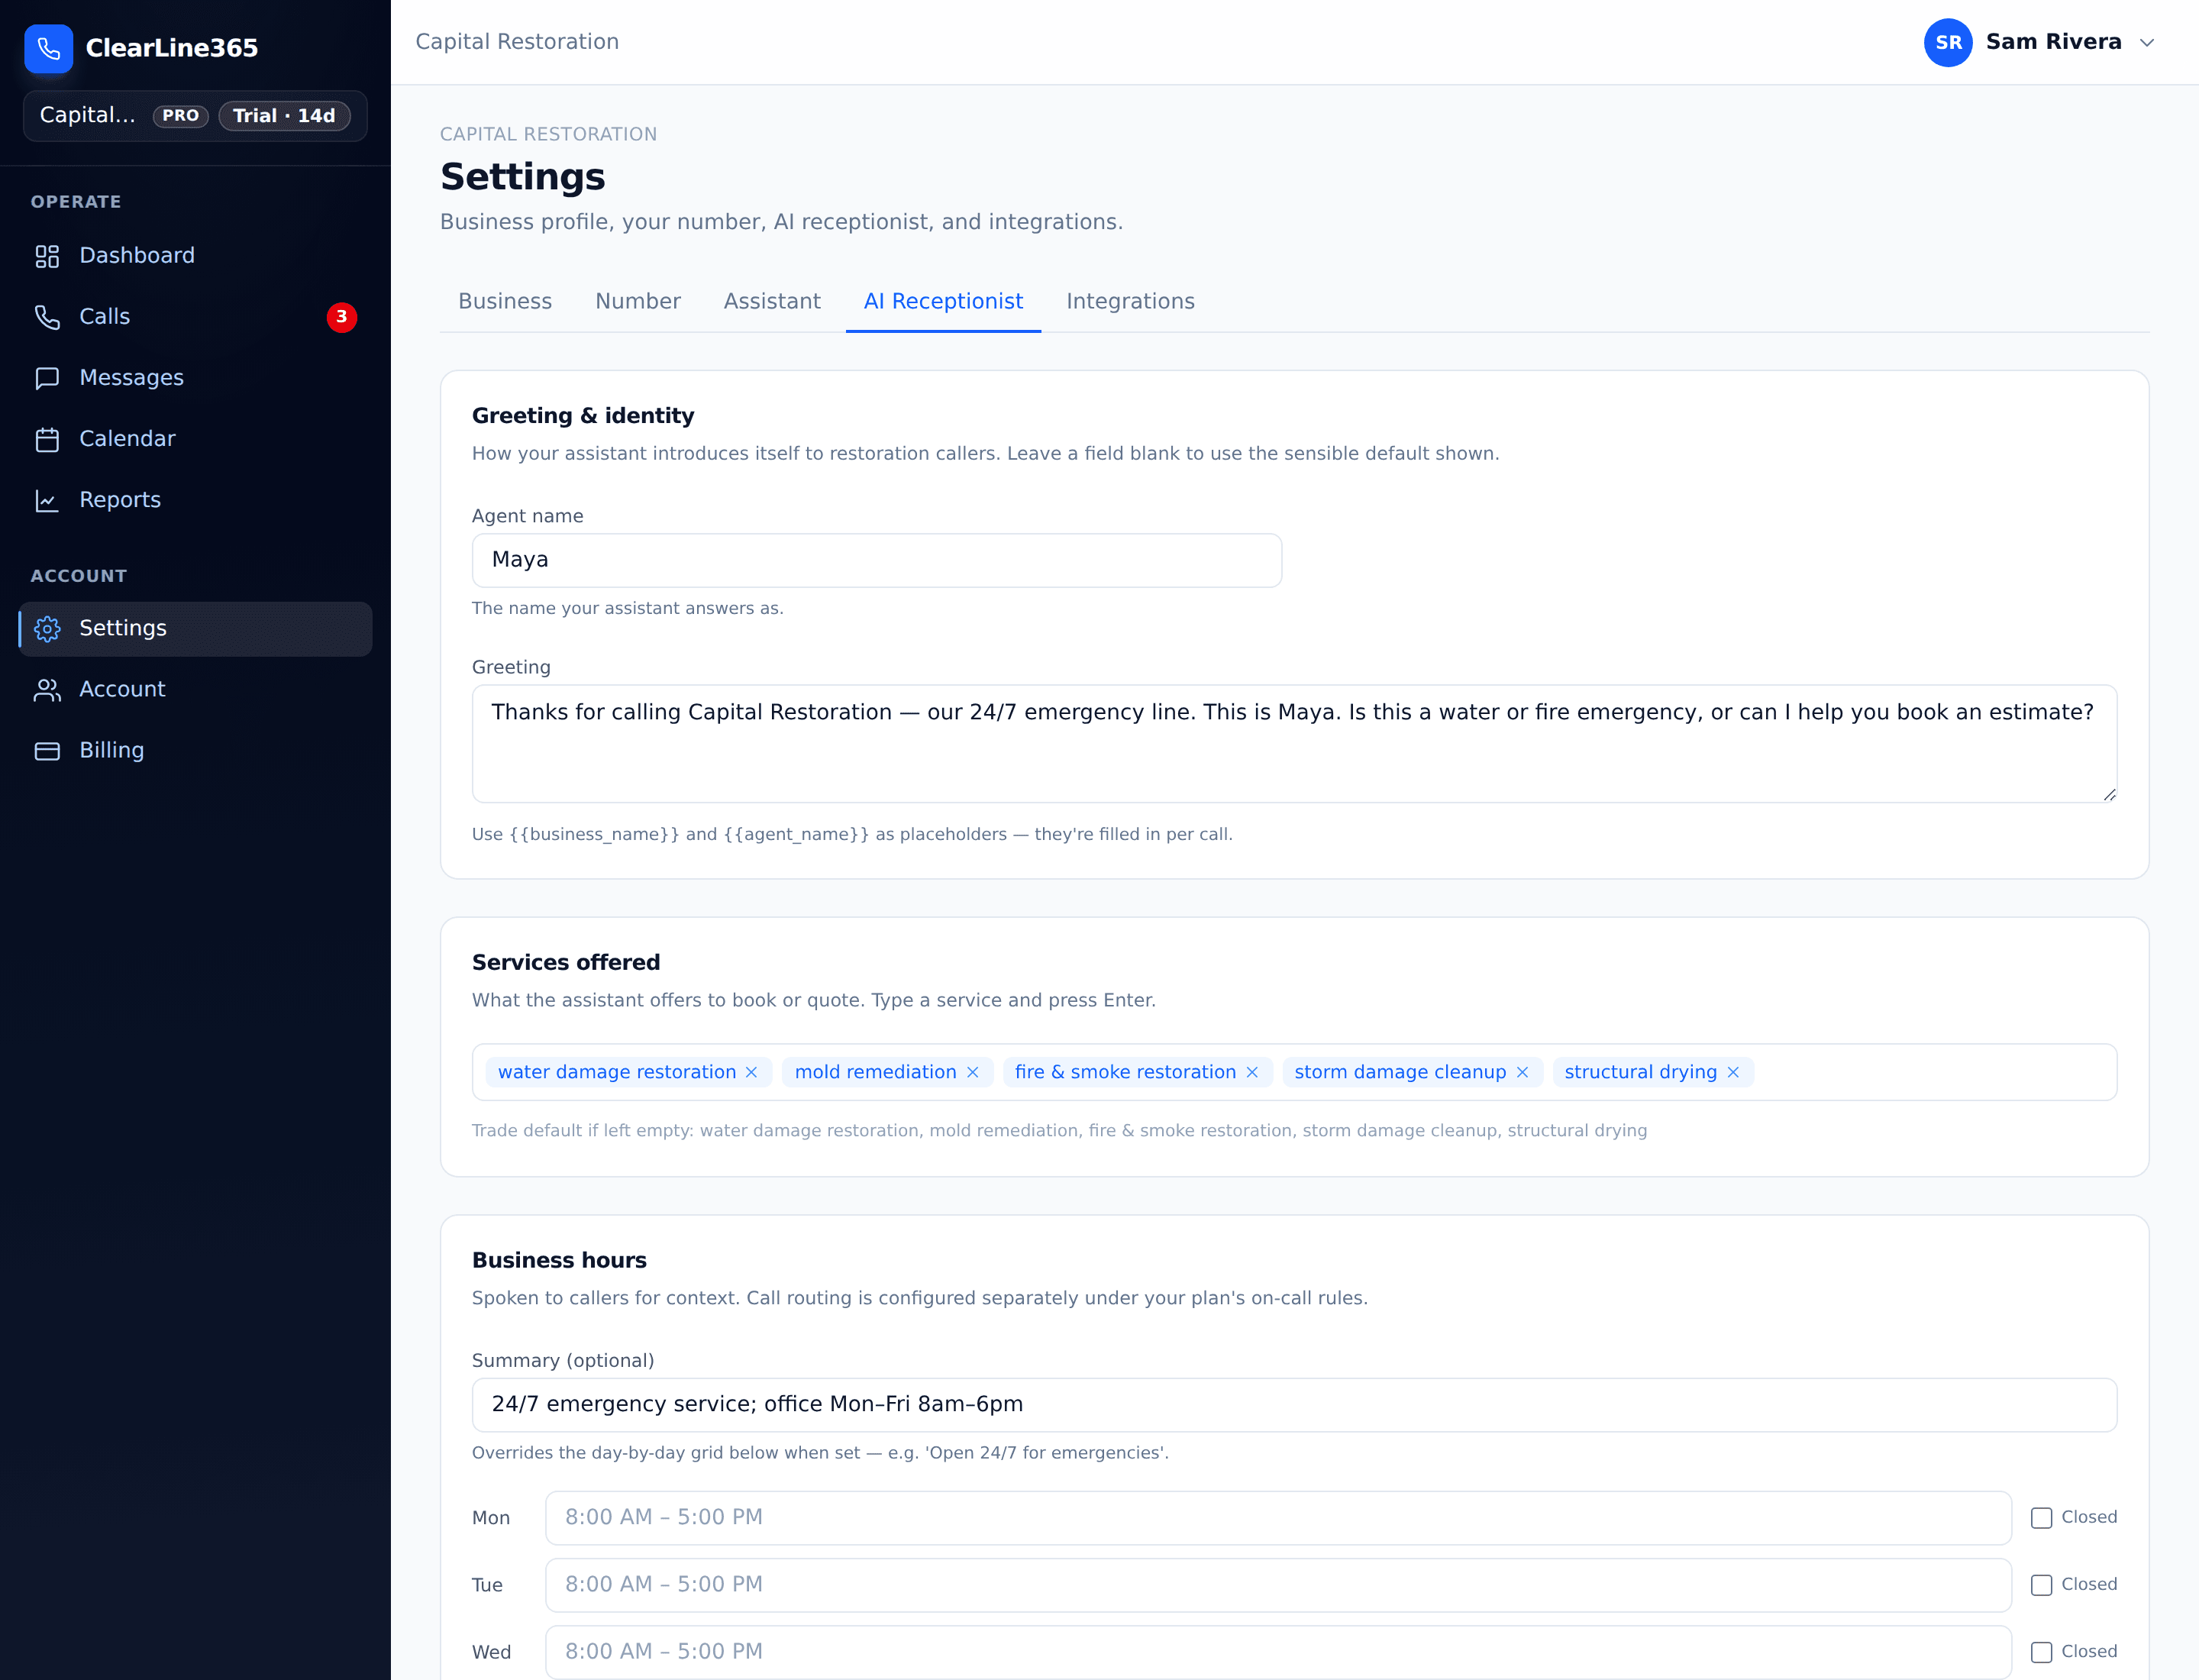
Greeting
Your receptionist is Cara — set the greeting callers hear first. Use the {{business_name}} and {{agent_name}} placeholders — they're filled in automatically on every call. Every call opens with a system-owned compliance line (recording + AI disclosure) and then your greeting, so what the caller hears looks roughly like:
[recording + AI disclosure — system-owned, exact wording set by ClearLine]
Thanks for calling {{business_name}}, this is {{agent_name}}. How can I help you today?
You only write the second line. The disclosure is added automatically and can't be edited or removed — it's what keeps every call compliant.
Services offered
Type each service you offer and press Enter to add it as a tag (e.g. water damage restoration, mold remediation, fire & smoke cleanup). Your receptionist uses these to qualify and book the right kind of job.
Business hours
Set a plain-language summary (e.g. “24/7 line for urgent calls; office Mon–Fri 8am–6pm”) and, if you like, the day-by-day grid. Hours are spoken to callers for context — call routing is configured separately under your plan's on-call rules.
Define what counts as urgent
Tell your receptionist which calls can't wait and who to reach:
- Urgent-call triggers — e.g. “no heat”, “flooding”, “gas smell”
- Who to call or text the moment an urgent call comes in
- Everything else is captured as a standard lead or estimate request